Wednesday, July 31, 2013

sabudana ladoo

sabudana ladoo recipe

sabudana ladoo - a sweet recipe which is good for fasting as well as during festival days. sabudana or tapioca pearls is one ingredient which is much used during fasting or vrats in india. you can make sabudana khichdi, vada, thalipeeth, kheer or cutlets with them.

this method of making sabudana ladoos were shared by my mom. she had seen this on a tv show. she only saw the way these ladoos are made and told me the method. i had no inkling of the quantity of the ingredients that need to be used. so just eyeballed everything and made the recipe.

the original one uses ghee. i have used oil. now the difference between using oil and ghee is quite apparent in sweets like ladoos. firstly the ladoos don't have the aroma of ghee. secondly after cooling down, the ghee will solidify at room temperature and give a nice hold and shape to the ladoos. this does not happen with oil. the ladoos do hold shape but not like the ones made with ghee. the ladoos made with ghee are dense but the ones made with oil are a little loose.

as a vegan, i have very limited options in india when making indian sweets as far as ingredients are concerned. the other best option apart from ghee is coconut oil. however, since the ladoos have already desiccated coconut in them, i did not add coconut oil. i did not want too much of coconut flavor in these ladoos.

i have added hot oil later too, as i realized that the 4 tbsp oil i used to fry the cashews was not enough to bind the ladoos. with all the limitations and setbacks, these ladoos were good. they do stick in the teeth as its the nature of tapioca pearls to become sticky and gluey. so do give a try if you are looking for a different variety of ladoo that you want to make for festive or fasting ocassions.

lets start step by step sabudana ladoo recipe:

1. roast the sabudana (tapioca pearls) in a kadai or pan in a low flame. this step takes a long time… about 30 mins. you have to stir continuously. the pearls swell a bit and become crunchy and light brown when nicely roasted. if you bite, they won't be crisp as fried sabudana pearl….. but you can bite into it.

2. as mentioned above, this process of roasting take approx 25 to 30 minutes on a low flame. you can see in the pic the color and texture of the pearls. cool the pearls completely and then grind to a fine powder in a dry grinder.

3. lightly roast the desiccated coconut for 2-3 minutes.  no need to brown the coconut.

4. in the same pan where you have roasted the coconut, add the ground sabudana powder.

5. add powdered sugar and mix well.

6. heat oil/ghee in a pan. add chopped cashews and fry them till golden.

7.  pour this whole mixture of oil and browned cashews into the sabudana mixture. also add cardamom powdered and nutmeg.

8. mix very well.

9. when the mixture is still slightly hot or warm. make medium sized balls from it.

10. make all the ladoos in a similar way. sabudana ladoo are ready to be served.

11. you can also store the sabudana ladoos in an air tight container in a fridge for a week or so. enjoy the sabudana ladoos.

sabudana ladoo

if you are looking for more fasting recipes then do check roasted makhana, palak raita, aloo paneer koftagreen peas sundal and aloo chaat,

sabudana ladoo recipe details below:

sabudana ladoo – makes 9-10 ladoos

Author:

Recipe type: desserts

Cuisine: indian

Serves: 2-3

  • 1 cup sabudana (tapoica pearls)
  • ¾ cup dessicated coconut
  • ½ or ⅔ cup powdered sugar or as required
  • 6 to 7 tbsp oil or ghee
  • 9 to 10 cashews chopped
  • 4-5 cardamom, powdered
  • ¼ tsp grated nutmeg
  1. roast the sabudana (tapoica pearls) in a kadai or pan on a low flame.
  2. they will swell a bit and become crunchy and light brown.
  3. this process will take approx 25 to 30 minutes on a low flame.
  4. cool the pearls completely and then grind to a fine powder in a dry grinder.
  5. also lightly roast the coconut for 2-3 minutes.
  6. no need to brown the coconut.
  7. in the same pan where you have roasted the coconut, add the ground sabudana powder and sugar.
  8. mix well and keep aside.
  9. heat the 6 or 7 tbsp oil/ghee in a small pan.
  10. add chopped cashews and fry them till golden.
  11. pour this whole mixture of oil and browned cashews into the sabudana + coconut + sugar mixture.
  12. also add cardamom powdered and nutmeg.
  13. stir very well with a spatula or wooden spoon.
  14. then when the mixture is still lightly hot or warm, make medium sized balls from it.
  15. sabudana ladoo are ready to be served.
  16. you can also store the ladoos in an air tight container in a fridge for a week.

3.2.2089


via Veg Recipes of India http://feedproxy.google.com/~r/VegRecipesOfIndia/~3/5YZn6oMlXCg/
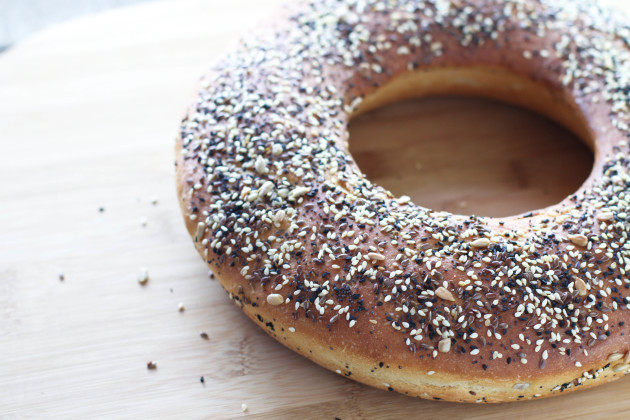


ifttt
Put the internet to work for you. via Personal Recipe 3542052

How To Make Kettle Corn at Home — Cooking Lessons from The Kitchn

How To Make Kettle Corn at Home

If your nose doesn't lead you straight to the kettle corn vendor at just about any state fair or festival this summer, then your ears surely will. The aroma of lightly caramelized popcorn combined with the merry sound of popping is all the encouragement I need to buy myself a big bag for snacking. Craving this sweet and crunchy treat without the road trip? Here's how you can make kettle corn at home.

How To Make Kettle Corn at Home

In the pantheon of popcorns, kettle corn sits somewhere in between plain popped corn and caramel corn. It's lightly golden — more or less so depending on the amount of sugar you use — and salty-sweet. It has a crisp crunch from the sugar coating, but won't stick to your teeth the way caramel corn sometimes does. Kettle corn also takes significantly less time than full-on caramel corn since it's made entirely on the stovetop — it's a quick 5-minute snack right when you need one.

And you most definitely do want to make it on the stovetop. The secret to kettle corn, both at the State Fair and at home, is letting the sugar caramelize just a bit over direct heat as the popcorn pops. You just can't imitate that rich flavor in the microwave — or with commercial microwave popcorn!

How To Make Kettle Corn at Home

To avoid burning the sugar and get every piece of popcorn coated with sugar, keep shaking that pan as the popcorn pops. Also, don't be tempted to wait until every kernel has popped; remove the pan from heat as soon as popping slows. You'll end up with more unpopped kernels, but it's worth it to avoid scorching the whole batch. This said, you'll always get a few burnt pieces in the bunch — just pick them out and carry on snacking.

Kettle corn has become a new favorite afternoon treat. I also find that unless it's very humid outside, the popcorn will stay fairly crisp for a few days if kept in a sealed container. Pack it up and tuck it in your bag for an easy snack on the go.

How To Make Kettle Corn at Home

Makes 6 to 8 servings (About 10 cups)

What You Need

Ingredients
3 tablespoons oil, like coconut oil, canola oil, or other vegetable oil
1/2 cup corn kernels
1/4 to 1/2 cup white granulated sugar, to taste
1 teaspoon salt

Equipment
Baking sheet
Parchment paper
4-quart sauce pot with lid
Long-handled spoon for stirring

Instructions

  1. Prep the Baking Sheet: Line a baking sheet with parchment and set it near the stove. You will pour the popped corn out onto this sheet to cool.
  2. Warm the Oil: Pour the oil into the pot and drop three kernels of corn over the top. These three kernels will be your indicator for when the oil is hot. Cover with the lid and set over medium-high heat.
  3. Add the Corn Kernels, Sugar, and Salt: When you hear one of the kernels pop, uncover the pot and pour in the rest of the kernels, sugar, and salt. Use 1/4 cup of sugar if you like slightly sweet kettle corn and more if you like sweeter. Quickly stir everything together to coat all the kernels and replace the lid.
  4. Shake the Pan While the Popcorn Pops: Shake the pan occasionally as the popcorn starts to pop, and then more frequently and vigorously as the popping increases. Rest the pot on the burner every few seconds to maintain the heat.

    → Some wisps of steam toward the end of popping are normal — don't confuse this with smoke! However, if you smell smoke, stop popping and proceed with the next steps.

  5. Remove from Heat When Popping Slows: Listen closely — when you hear the popping begin to slow, 1 to 2 seconds between pops, remove the pan from heat. Don't wait for every kernel to pop or you'll end up burning the popcorn; as soon as you think it might be starting to slow down, take it off the heat. Total popping time is about 2 to 3 minutes on my stove.
  6. Pour the Popcorn Onto the Baking Sheet: When the popping slows, immediately uncover the pot and pour the popcorn on the prepared baking sheet. Use the long-handled spoon and your fingers to spread the popcorn into an even layer to cool and pick out any burnt pieces (there are always a few in every batch!).
  7. Cool the Popcorn: Let the kettle corn cool for at least five minutes — the popcorn will crisp as it cools. Eat immediately or store in an airtight container for several days.

Recipe Notes

  • Cleaning the Pan: Unless you have a Whirley Pop popcorn maker, I've found that you'll always get some burnt sugar on the bottom of the pan. This is normal. To clean the pan, follow these instructions.
  • Kettle Corn with Other Sugars: Kettle corn is usually made with plain old white granulated sugar, but this shouldn't stop you from experimenting! Try any other granulated sugar, like turbinado or muscavado, or experiment with liquid sweeteners like honey and maple syrup.
  • Unpopped Kernels: Look out for unpopped kernels, which can get stuck to in the clusters and give your molars a nasty shock when you bite down. This is a good candidate for this trick for separating out unpopped kernels.

Want more smart tutorials for getting things done around the home?
See more How To posts
We're looking for great examples of your own household intelligence too!
Submit your own tutorials or ideas here!

(Images: Emma Christensen)


via Recipe | The Kitchn http://feeds.thekitchn.com/~r/thekitchn/recipes/~3/PGrESXC4bWI/story01.htm


ifttt
Put the internet to work for you. via Personal Recipe 3564745

Recipe: Heirloom Tomato Salad with Pomegranate-Sumac Dressing — Recipes from The Kitchn

Recipe: Heirloom Tomato Salad with Pomegranate-Sumac Dressing

You'd think I didn't like fresh tomatoes, the way I avoid them most of the year. Yet it's precisely because I love tomatoes — ripe, juicy, just-plucked and not shipped-around-the-world ones — that I wait until summer. At last the season has arrived, filling my dinner plate with colorful rounds of heirloom tomatoes. Here's one way I like to serve them: a simple salad with a sweet, tangy pomegranate and sumac dressing and a handful of fresh herbs.

Recipe: Heirloom Tomato Salad with Pomegranate-Sumac Dressing

You don't have to use heirloom varieties in this salad, and in fact, the dressing can enhance a somewhat bland hothouse tomato. But do yourself a favor and seek out fruit that smells earthy and sweet and tomato-y, whether it's from your garden, a farmers market, or the grocery store. A mix of colors is always nice, too. (And remember, when it comes to heirloom tomatoes, scars are a-okay!) 

Recipe: Heirloom Tomato Salad with Pomegranate-Sumac Dressing

To play up the tangy sweetness of the tomatoes, the salad includes a Middle Eastern fattoush-inspired dressing with olive oil, lemony ground sumac, and rich pomegranate molasses. (Store-bought pomegranate molasses are fine but usually contain sugar; I use my sugar-free DIY version instead and add a drop of honey to the dressing.) Top the tomatoes with a scattering of basil, mint, and parsley, and you have a fresh, simple side dish for any summer meal. 

Recipe: Heirloom Tomato Salad with Pomegranate-Sumac Dressing

Heirloom Tomato Salad with Pomegranate-Sumac Dressing

Serves 4

3 tablespoons extra virgin olive oil
1 tablespoon pomegranate molasses
1 teaspoon lemon juice
2 teaspoons sumac
Freshly ground black pepper
2 pounds tomatoes 
1 small shallot, thinly sliced
1 tablespoon each of fresh basil, mint, and parsley leaves
Fleur de sel or other flaky finishing salt

Whisk together the olive oil, pomegranate molasses, lemon juice, sumac, and pepper, and salt to taste. 

Slice the tomatoes into 1/4-inch-thick slabs. Arrange the tomatoes and shallots on a platter and drizzle with dressing. Depending on the size of the herbs, you can leave them whole or tear the leaves into smaller pieces. Scatter them on top of the tomatoes. Finish with salt. 

Best eaten soon after assembling. 

(Images: Emily Ho)


via Recipe | The Kitchn http://feeds.thekitchn.com/~r/thekitchn/recipes/~3/e6rtBHk1NHE/story01.htm


ifttt
Put the internet to work for you. via Personal Recipe 3564745

Seeded Loaf: Studded with Poppy Seed, Flax, Anise and More

Flax Seed Bread Photo

No, this isn't a giant Everything bagel you're looking at, but my choice to shape my bread into a ring instead of a boule unintentionally made it look that way. Funny though!

It wasn't too long ago when I wouldn't give seeded bread of any kind a second glance. They didn't "wow" me, and quite frankly I didn't feel like seeds added a thing to bread other than getting stuck in my teeth.

Sure, if you gave me a good loaf of rye with flavorful caraway seeds in it, I'd be all over it but beyond that, I wasn't convinced seeds had a place in my bread.

For me it's all about taste and if the seeds aren't adding something taste-wise, then really, what's the point? Then I started sampling seeds on bread a little more frequently and came to appreciate the subtle flavor of sesame seeds or the light crunch of the seeds on a Hard Poppy Seed Roll. Before I knew it, I was officially a seeded bread convert!

Flax Seed Bread Picture

That's when I started going hog wild and putting seeds in and on everything! But only now have I perfected the shower of seeds.

Tasting nothing like an Everything bagel, this buttery Seeded Loaf is the perfect seeded creation. Those seeds atop the lovely loaf? Oh, they aren't just there for looks.

With poppy, black caraway, flax, toasted sesame, midget sunflower and anise, these little seeds each bring their own unique flavor to the party and all meld perfectly together. They add not only flavor, but a unique texture as well, which makes this simple loaf of bread something special indeed.

Ingredients

  • 3 1/2 cups all-purpose flour
  • 2 1/4 teaspoons instant yeast
  • 2 tablespoons granulated sugar
  • 1 1/2 teaspoons salt
  • 1 1/2 teaspoons baking powder
  • 1 1/3 cups water, very warm (115-125°f)
  • 3 tablespoons unsalted butter, melted
  • 5 tablespoons seed mix

Directions

  1. In a large bowl, in the bowl of a stand mixer fitted with a dough hook whisk together with flour, instant yeast, granulated sugar, salt and baking powder.
  2. With the mixer on medium-low speed, slowly pour in the warm water. Once all the water has been added, increase speed to medium and knead until a smooth, soft dough forms and begins to pull away for the sides of the bowl, about 6 minutes.
  3. Form the dough into a round and place into a large, lightly oiled bowl and turn to lightly coat on all sides. Cover with plastic wrap and set at warm room temperature to rise until doubled in size, about 1 hour.
  4. Using a bit of the melted butter, brush the inside and sides of a ring mold or an 8-inch cake pan.
  5. Gently deflate the risen dough and form into a 7-inch round. If making a ring, make a hole in the center and fit into a ring pan. To make a boule, shape the dough into a 7-inch round and place in cake pan.
  6. Brush top and sides of dough with butter, you may not use all the remaining butter. Sprinkles with seed mixture and set the dough aside to rise at warm room temperature until the dough fills the pan and has risen over the top of the pan 1-2 inches, about 30-45 minutes.
  7. Preheat oven to 375°F. Bake bread in preheated oven for 40 minutes and well browned.
  8. Remove loaf from oven and from pan. Cool completely on a wire rack.

Notes

I use King Arthur Flour's Artisan Bread Topping for this loaf, but any seed mixture you want to put together or purchase will work.


via Food Fanatic http://www.foodfanatic.com/2013/07/seeded-loaf-studded-with-poppy-seed-flax-anise-and-more/


ifttt
Put the internet to work for you. via Personal Recipe 3564685

Chopped Review: Break a Crab Leg!

This week's episode of Chopped started out with a rough and uncreative appetizer round, but improved as the chefs got their footing during the entree and dessert rounds.

The Contestants:
Josie, Personal chef from New York City
Chris, Chef de cuisine from Los Angeles
Betsy, Sous chef from New York City
Lucas, Sous chef from New York City

This Week's Judges: Marc Murphy, Maneet Chauhan, and Geoffrey Zakarian.

Chopped pic

The Appetizer Round: The chefs had 20 minutes to create an appetizer using babaco, gio lua, chive blossoms, and quark. If it has a strange or difficult-to-pronounce name, it was in this basket.

The judges were really hoping that these unfamiliar ingredients would spark some real creativity in the contestants, but for the most part, this was not the case. 

Josie's Gio Lua with Chive Blossom Pancake and Lucas's Open-Faced Taco (isn't that just a tostada?) came the closest to thinking outside the box, though they both still had a number of issues. Betsy's Gio Lua Crostini had some good elements, but in general disappointed the judges with its lack of development in flavor and technique.

Chris, however, was the biggest disappointment by far in this round. Geoffrey Zakarian stole the words out of my mouth when he called Chris's Pan-Seared Gio Lua "lazy." He did barely enough to prove that he is actually a chef, and certainly not enough to keep him in this competition.

The Dinner Round: The contestants had 30 minutes to create an dinner recipe containing crab legs, sweet vermouth, green asparagus, and Mexican wedding cookies. It would appear that putting dessert items in the savory round baskets is a new Chopped trend – one I'm sure the contestants wish would end.

Betsy served Crab Leg Hash, which the judges felt was hearty and delicious but lacking enough crab. Josie created Crab and Sweet Potato Chowder, served with a giant piece of crab shell for Maneet Chauhan. That could have easily gotten her sent home, but luckily for her Lucas spent far too much time making a very mediocre pasta for his Crab and Asparagus Pasta, and did not spend enough time focusing on the actual basket ingredients. In spite of his disparaging remarks against personal chefs, he was sent home while the personal chef went on to the dessert round.

The Dessert Round: The two remaining contestants had 30 minutes to create a dessert recipe using red bean paste, jicama, cilantro, and bacon jam. It is baskets like this one that make me glad I am not a judge on this show.

Josie pulled inspiration from Chinese New Year with her Red Bean Cake, though the cake was not as successful as she had hoped, while her Bacon Jam and Chocolate Mousse was a great success. Betsy was also only halfway successful with her dish; her Sweet Buttermilk Pancake was visually stunning and a good approach to the basket, but her frozen yogurt simply had too much bacon.

In the end, it was the appetizer round that put Josie just a bit ahead of Betsy, wining her the title of Chopped Champion and proving to her father – and Lucas – that personal chefs actually are worth their salt.

Thanks for reading and remember to bookmark our section of Food Network recipes!


via Food Fanatic http://www.foodfanatic.com/2013/07/chopped-review-break-a-crab-leg/


ifttt
Put the internet to work for you. via Personal Recipe 3564685

Mini Corn Dog Pops

Growing up in the Midwest, county fairs and hometown carnivals were a summertime staple.   The minute my nose catches the deep-fried, on-a-stick goodness of  fair food I am immediately transported back to those carefree summers of my childhood.

I wanted to recreate a bit of that experience without the hassle and mess of using a fryer.  These corn dogs can be prepared quickly and easily at home.  Best of all, they are mini!

Keep reading for the recipe…

All you need is a corn bread muffin mix, a couple of hot dogs and a few cake pop sticks.  Simply prepare the corn bread muffin mix according to package directions.  Pour into mini muffin pans and insert a hot dog slice.  When they come out of the oven, insert a cake pop stick and you are done!

I like to think of these mini corn dog pops as a "copycat" version of a classic state fair corn dog on-a-stick.  They are a great way to enjoy one of the flavors of summer any time of year!

Want to make these "Mini Corn Dog Pops" for yourself?

Click here for the full recipe –>  http://restaurant.betterrecipes.com/mini-corn-dog-pops.html


via The Daily Dish http://www.betterrecipes.com/blogs/daily-dish/2013/07/31/mini-corn-dog-pops/


ifttt
Put the internet to work for you. via Personal Recipe 3575582

Mahi Mahi Fish Tacos with Chipotle Slaw and Roasted Pineapple Sauce

]]> Mahi Mahi Fish Tacos with Chipotle Slaw and Roasted Pineapple Sauce

photo by MasterChef

yield
Serves 4

This is a winning-contestant recipe from Season Four of FOX's MasterChef.
For the pineapple sauce:
  • 2 cups chopped peeled and cored fresh pineapple
  • 1/2 yellow bell pepper, halved lengthwise again and seeded
  • 1 fresh red jalapeño, halved lengthwise and seeded
  • Juice of 1 lime juice
  • Salt and freshly ground black pepper to taste
For the slaw:
  • 1/2 head white cabbage, thinly sliced
  • 1/2 head red cabbage, thinly sliced
  • 1 bunch red radishes, greens trimmed and radishes sliced thin
  • 1 bunch cilantro, stems reserved for another use and leaves thinly sliced or minced
For the dressing:
  • 1 cup mayonnaise
  • 1 cup sour cream
  • 3 chipotles in adobo, minced, plus 4 tablespoons adobo sauce
  • 1 teaspoon garlic powder
  • Salt and freshly ground black pepper to taste
For the fish:
  • 1 pound mahi mahi fillet, skinned
  • 1 tablespoon sweet paprika
  • 1 tablespoon cayenne pepper
  • Salt and freshly ground black pepper to taste
  • 8 corn or flour tortillas
  • cilantro sprigs for garnish

Preparation

Make the pineapple sauce:
In a grill pan over moderately high heat, sear and soften the pineapple, bell pepper, and jalapeño, turning occasionally with tongs. Transfer the pineapple, bell pepper, and jalapeño to a blender and add the lime juice, then purée the mixture. Season the sauce with salt and freshly ground black pepper and keep at room temperature.

Prepare the slaw:
In a large bowl toss together the cabbages, the radishes, and the cilantro.

Prepare the dressing:
In a medium bowl whisk together the dressing ingredients and season it with salt and freshly ground black pepper to taste.

Prepare the fish and warm the tortillas:
Prepare a grill for moderately high heat.

While the grill is heating, cut the fish crosswise into 1-inch wide strips. In a small bowl whisk together the paprika and the cayenne and sprinkle it evenly all over the strips. Season the strips well with salt and freshly ground black pepper.

Divide the tortillas into 2 stacks and wrap each stack in foil. Warm the tortillas on the grill, turning once or twice, until heated through, about 3 minutes. Remove the packets from the grill and keep warm in a kitchen towel.

Oil the grill rack, then grill the fish, covered, turning it once, until it is opaque and just cooked through, about 6 minutes total. Transfer the fish to a platter and keep it warm, covered.

Assemble the tacos:
Drizzle the dressing over the slaw and toss it well. Divide the fish among the warm tortillas and top it with the slaw. Garnish the tacos with the cilantro sprigs and serve them with the pineapple sauce on the side.

From MasterChef, (C) © 2013 FOX

my notes


via Epicurious.com: New Recipes http://feeds.epicurious.com/~r/newrecipes/~3/t7F2IdErADs/51180230


ifttt
Put the internet to work for you. via Personal Recipe 3575434
Related Posts Plugin for WordPress, Blogger...