Tuesday, December 31, 2013

eggless pineapple cream cake recipe, how to make pineapple cream pastry

by dassana amit updated January 1, 2014

eggless pineapple cream cake

eggless pineapple cream cake recipe – a sweet post to welcome the new year. wish all of you a happy & prosperous new year.

this eggless cake recipe is again not difficult and easy one. you need a base vanilla cake or sponge cake. you can use your own favorite vanilla cake recipe or you can buy the cake from out. the cream i added is amul cream and the pineapples are the tinned ones.

i have shown only the assembling part in the step by step pics. you can look at the step by step pics, if you plan to make the eggless vanilla cake at home.

eggless pineapple cream cake recipe

this is a rich creamy cake, excellent for birthdays, anniversaries and family get togethers.

step by step eggless pineapple cream cake recipe:

1.  i have used my eggless vanilla cake recipe as the base cake.

base cake

2. slice the vanilla cake into two equal parts.

slice the vanilla cake

3. brush the base slice lightly with some pineapple juice.

brush cake with pineapple syrup

4. whip cream with icing sugar & vanilla extract or pineapple essence with a hand held electric beater or in a stand mixer attached with the wire whip blade. if using a stand mixer beat at the highest speed till you get stiff peaks. don't overdo the beating as the cream might turn into butter, when you get stiff peaks, just stop the mixer or beater.

whip cream, icing sugar and vanilla extract

5. take 1/4th or 1/3rd of the whipped cream and mix finely chopped pineapple with it. mix well.

add chopped pineapple pieces

6. spread the pineapple cream frosting on the base slice evenly.

spread the pineapple cream over cake

7. cover with the other half.

preparing pineapple cream cake recipe

8. spread the frosting on the cake all over and even with a flat spatula or palette knife. decorate with pineapple slices.  i decorated with some choco chips too.

decorate cake with pineapple slices

9. keep the cake in the refrigerator for 2-3 hours so that the cream frosting sets. slice the eggless pineapple cream cake and serve immediately.

eggless pineapple pastry

if you are looking for more eggless cakes then do check christmas fruit cake, tutti frutti cakegingerbread cake, christmas wine fruit cake and strawberry cream cake recipe.

eggless pineapple cream cake recipe below:

eggless pineapple cream cake recipe

Total time

1 hour 30 mins

Author:

Recipe type: dessert

Cuisine: world

  • 1.5 cups all purpose flour/maida
  • 1 tsp baking powder
  • a pinch of salt
  • ½ cup water
  • ½ cup melted butter or oil
  • ¾ cup organic unrefined cane sugar or regular sugar – add as required * check notes
  • 3 tbsp yogurt/curd (dairy or vegan) + 1 tbsp water
  • 1 tbsp apple cider vinegar or white vinegar
  • ½ tsp baking soda
  • 1 tsp vanilla extract or pineapple essence
  • 200 ml whipping cream – use cream which has at least 30% fat
  • ¼ tsp vanilla extract or pineapple essence
  • 4-5 tbsp icing sugar or as required
  • 2 to 3 pineapple slices, finely chopped
  • 3 to 4 pineapple slices for decoration
  • a few glazed cherries for decoration or chocolate chips (optional)
  • 2 to 3 tsp pineapple juice for brushing on the cake (optional)
  1. first sift the all purposed flour/maida with the baking powder and a pinch of salt in a mixing bowl or pan.
  2. just keep everything ready as you have to be quick enough to mix the batter.
  3. preheat the oven to 180 degrees C.
  4. grease a 6 or 7 inches pan with butter or oil. you can also line the pan with butter paper and then grease the butter paper with oil or butter.
  5. now take some butter and melt it in a small pan or microwave.
  6. you need to get about ½ cup of melted butter. just melt the butter. no need to heat it.
  7. when the butter is still warm or a bit hot, add the sugar to the melted butter.
  8. stir and mix well. keep aside.
  9. now in a measuring cup or in a small bowl, whisk the 3 tbsp yogurt + 1 tbsp water till smooth.
  10. add 1 tbsp vinegar. then add the baking soda and stir.
  11. pour the butter+sugar mixture, ½ cup water and the frothing yogurt+vinegar+baking soda into the sieved flour.
  12. add vanilla extract or pineapple essence.
  13. be quick enough to fold and make a lump free batter. don't over do the folding.
  14. pour the batter in the greased baking pan.
  15. shake and tap the sides of the pan so that air bubbles are released.
  16. place the pan in the preheated oven in the center rack.
  17. keep the heating in both the bottom and top elements of the oven on.
  18. bake at 180 degrees C for 30-35 minutes or more till a tooth pick inserted in the cake comes out clean.
  19. if the vanilla cake browns too quickly on the top, then cover the top with an aluminium foil or butter paper.
  20. once done let the vanilla cake stand at room temperature for 7-8 minutes.
  21. then with the help of oven mitts, gently remove the vanilla cake on a wired tray or rack.
  22. once the vanilla cake cools, you can serve the eggless vanilla cake as it is or use the vanilla cake to make pastries or gateau.
  23. let the cake cool completely before you prepare the icing.
  1. finely chop 2 to 3 pineapple slices and keep aside.
  2. slice the cake with a serrated knife from the center carefully into two equal halves.
  3. brush the base slice of the cake with some pineapple juice.
  4. in a stand mixer fitted with the wired whip blade, whip the cream and icing sugar along with vanilla extract or pineapple essence, at high speed till you get stiff peaks in the cream.
  5. taste the cream and add more icing sugar if required.
  6. you can also use a hand held electric beater to whip the cream.
  7. the cream should have stiff peaks – meaning on turning the bowl the cream should not fall down.
  8. mix the finely chopped pineapple with ¼ or ⅓ of the cream
  9. spread the pineapple cream frosting on the base slice evenly..
  10. keep the other cake half over.
  11. now spread the remaining whipped cream all over the cake on the top as well as the sides, with a palette knife or spatula evenly.
  12. decorate the cake with a few more pineapple slices.
  13. keep the cake in the refrigerator for 2 to 3 hours so that the cream icing sets.
  14. remove the cake and decorate the cake with the fresh strawberry slices.
  15. serve the eggless pineapple cream cake immediately.
  16. or you can keep it covered in the fridge and then serve later.
  17. its advisable to finish this pineapple cream cake in a day or two.

3.2.2265


via Veg Recipes of India http://feedproxy.google.com/~r/VegRecipesOfIndia/~3/ZNmkJlbD_5U/

IFTTT

Put the internet to work for you.

via Personal Recipe 3542052

Detox Soup: New Year, New You

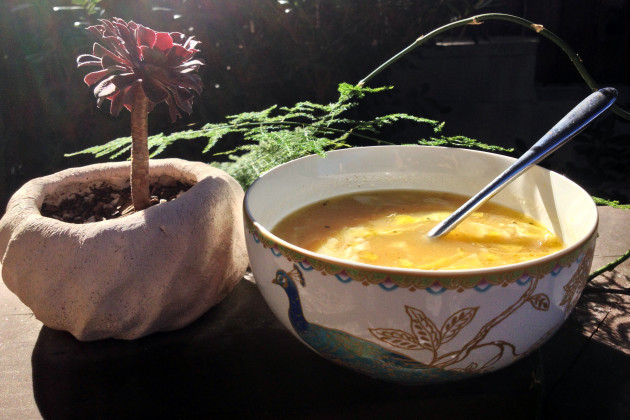
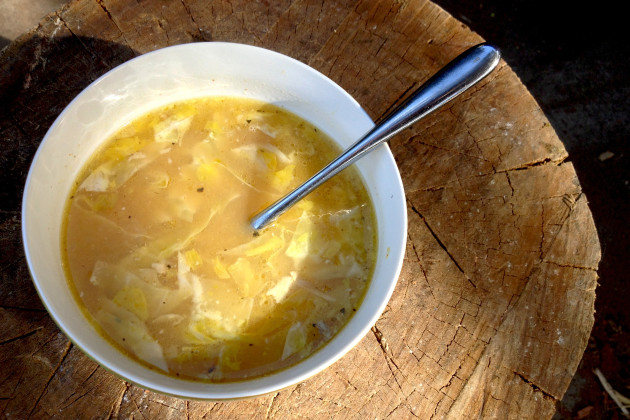
Detox Soup Photo

Ok, so if you're going out on New Year's Eve, do yourself a favor and make this soup one or two days before the festive first, and store in the fridge. Feel free to eat this detoxifying soup for every meal of the day for maximum power!

I'd even venture to say if you're going about a New Year's cleanse, you might make a large batch to have on hand for those moments you have to eat something. Just because cheating happens and this soup is a better option than going crazy with processed foods that would defeat the purpose!

Detox Soup Picture

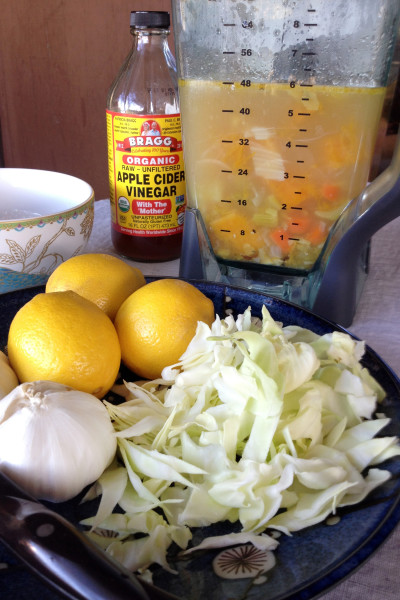
This soup is great because it's super low in calories, and the citrus and apple cider vinegar will help alkalize your body's PH, bringing it back into balance after what is usually an acid forming holiday season.

From what I've read, a soup like this helps to cleanse toxins by flushing with fiber and clean broth, remove heavy metals (especially if you add a dollop of Cilantro or Food Fanatic's Cilantro Chutney) and all the while nourishing your soul with warm, deliciousness.

You can substitute a gluten-free veggie broth to easily make this recipe vegan, so experiment and add what's in the fridge so it doesn't go to waste. It is one of my 2014 goals to enjoy a mostly raw food and juice cleanse during the month of January, so I'll be making a variation of this soup every Sunday to have it on hand all week long, should I lose my mind with hunger.

I've never done a cleanse, and I'm a bit nervous. If you've had any experience I'd love your advice!

Detox Soup Image

Happy New Year Everyone!!! I wish for you to experience much love, happiness and delicious things in the coming year! 

Ingredients

  • 10 cups chicken broth
  • 12 ounces butternut squash, cubed
  • 1/2 yellow onion
  • 6 stalks celery, chopped
  • 6 cups baby carrot, organic, chopped
  • sea salt, himalayan, to taste
  • cayenne pepper, to taste
  • lemon juice, fresh, to taste
  • 4-10 cloves garlic, as many as you can handle
  • 1 cup green cabbage, organic, chopped
  • 1/4 cup apple cider vinegar

Directions

  1. Use boxed (avoid canned) organic, gluten-free chicken broth or you can make your own homemade chicken broth by placing 1-4 lb. cooked, whole chicken carcass (with skin, bones and any meat you'd like) into a stockpot with chopped celery, carrots and onions. (Use a gluten-free, store-bought rotisserie or home-baked whole chicken.) Boil down prepared chicken in 8 cups of filtered water (approx. 2 hours).
  2. Season to taste.
  3. Once broth is as full of flavor as you'd like, strain all bones and skin pieces out of the pot and discard.
  4. Remove pot from heat and let cool for 10-15 minutes.
  5. Chop garlic and add raw garlic to the broth.
  6. Place all contents of the pot into a food processor or blender (might take a few batches… and BE VERY CAREFUL THAT THE SOUP IS NOT HOT AT THIS TIME.)
  7. Return liquid to pot and you can either add chopped cabbage now or add it at the end so it's raw … return to a boil on medium/high heat.
  8. Once boiling again, season to taste… fresh thyme, sage and bay leaves are always good in soups!)
  9. Add apple cider vinegar, lemon juice and any cruciferous, raw veggies you'd like to the bowls before serving.
  10. Enjoy!!!!

Notes

  • I personally add a dollop of Cilantro Chutney on to the top of my soup. And if you also add a dash of soy sauce and a pinch more cayenne pepper and some fresh lemon juice, you'll make a Hot and Sour soup that is packed with nutrition! Also feel free to add kale, broccoli, or any of your favorite cruciferous veggies to make this soup even better for your body!


via Food Fanatic http://www.foodfanatic.com/2013/12/detox-soup-new-year-new-you/

IFTTT

Put the internet to work for you.

via Personal Recipe 3564685

Date and Blue Cheese Ball

]]> Date & Blue Cheese Ball recipe

photo by Sheri Giblin

yield
Makes about 1 1/2 cups (360 ml)

Cheese balls were all the rage in the 1970s, an easy, tasty, fab party food for any occasion. What's old is now retro-chic—this lightened-up cheese ball seduces with the sweetness of dates, the savory bite of blue cheese, a hint of shallot, and a teasing whiff of lemon zest.

Skinny Dippers:
  • Crostini, Baked Pita Chips, Baked Bagel Chips, Marbled Rye Toasts, celery and carrot sticks

Preparation

1. In the bowl of a stand mixer fitted with the paddle attachment, beat together the cream cheese, blue cheese, and buttermilk on medium speed until smooth and creamy, about 2 minutes. Add the dates, shallots, lemon zest, salt, and pepper and beat until well combined.

2. Transfer the cheese mixture to a large sheet of plastic wrap/cling film and form it into a ball. Wrap the ball in the wrap and refrigerate until well chilled, at least 2 hours or overnight.

3. In a shallow bowl or plate, mix together the parsley and walnuts. Remove the cheese ball from the refrigerator. With the wrap/film still on, shape into a well-formed ball. Unwrap the cheese mixture and roll it gently in the nut mixture until all sides are well covered. Serve immediately or cover and refrigerate until ready to serve.

Dip Do-Ahead: The cheese ball can be prepared up to 2 days in advance. Cover and refrigerate.

Serving size: 2 tbsp
Calories 59; Fat 3.9 g (sat 2.1 g, mono 1.0 g, poly 0.4 g); Protein 2 g; Carb 4 g; Fiber 0 g; Chol 10 mg; Iron 0.1 mg; Sodium 109 mg; Calc 41 mg

Nutritional analysis provided by Skinny Dips

From Skinny Dips by Diane Morgan. Text copyright © 2010 by Diane Morgan; photographs copyright © 2010 by Sheri Giblin. Published by Chronicle Books LLC.

my notes


via Epicurious.com: New Recipes http://feeds.epicurious.com/c/35380/f/665147/s/355c29ad/sc/26/l/0L0Sepicurious0N0Crecipes0Cfood0Cviews0C360A8290Dmbid0Frss0Iepinr/story01.htm

IFTTT

Put the internet to work for you.

via Personal Recipe 3575434

Monday, December 30, 2013

pan fried tofu recipe, how to make pan fried tofu with peanut sauce

by dassana amit updated December 31, 2013

pan fried tofu recipe, fried tofu recipe

pan fried tofu with peanut sauce – one of the asian tofu recipes i had made many months ago. i had shared this recipe on nupur's blog uk rasoi as guest post.

i am adding this recipe for my readers. this is one easy tofu recipe which is quick to put together and makes for a great snack or appetizer. here regular tofu is used. the tofu is batter coated and pan fried and hence healthier.

these crisp fried tofu are served with a sweet and mildly spiced peanut sauce. the peanut sauce is again easy to assemble and is made smooth peanut butter.

i have adapted this tofu recipe from the complete book of vegetarian cooking. the original tofu recipe is made with eggs and deep fried. i have made it eggless and pan fried. also i omitted some ingredients like barbecue sauce & rice vinegar in the peanut sauce as i did not have them. i have used my own proportions and included quite a few ingredients which were not in the original recipe.

pan fried tofu recipe

if you are looking for more tofu recipes then do check tofu bhurji, thai veg tofu soupscrambled silken tofu with vegetables and thai basil vegetable stir fry with tofu.

pan fried tofu with peanut sauce

Author:

Recipe type: appetiser

Cuisine: asian

  • 3 tbsp smooth peanut butter
  • 1 tbsp apple cider vinegar or rice vinegar
  • ½ to 1 tbsp organic cane sugar or as required – depends upon the sweetness of the peanut sauce
  • ½ tsp red chilli powder or red chili flakes
  • ¼ tsp soy sauce
  • salt as required
  • 250 gms plain tofu
  • 3 tbsp all purpose flour/maida
  • 3 tbsp cornflour/cornstarch
  • ½ tsp red chilli powder or red chili flakes
  • ½ tsp black pepper
  • ½ tsp soy sauce
  • ¼ tsp baking powder
  • 1 or 2 sichuan pepper, crushed (optional)
  • 2 to 3 tbsp oil for pan frying
  • ½ cup water
  • salt as required
  1. first combine the vinegar, sugar and salt in a pan.
  2. keep on flame and bring to boil. then simmer for 1-2 minutes.
  3. remove from heat and add peanut butter, soy sauce, chili powder or flakes.
  4. stir and mix well. pour peanut sauce in a serving bowl and keep aside.
  1. chop the tofu into cubes or triangles or rectangles.
  2. take the all purpose flour, corn flour, sichuan pepper, red chili powder, baking powder, soy sauce, water and mix to a smooth batter.
  3. heat oil in a frying pan. dip the tofu pieces in the batter and place them one by one in the pan.
  4. when one side of tofu becomes opaque and done, flip and cook the other side.
  5. pan fry till the tofu till they are crisp and light golden and done.
  6. serve the pan fried tofu with the peanut sauce.

3.2.2265


via Veg Recipes of India http://feedproxy.google.com/~r/VegRecipesOfIndia/~3/oOgnhrf6cYg/

IFTTT

Put the internet to work for you.

via Personal Recipe 3542052

Swedish Chocolate Balls

CHOCOLATE BALLS

1/4 lb or 1 stick unsalted butter (room temperature)
1 1/4 cups sugar
1 tsp vanilla extract
1 tbsp strong coffee (cold)

2 tbsp unsweetened cocoa

2  cups rolled oats

1 cup Coconut flakes

Combine butter, sugar, vanilla extract and coffee.  Mix in rolled oats and cocoa.

Roll into balls and roll in coconut.  Refrigerate at least 2 hours before serving.

add more oats if its too sticky


via The Daily Dish http://www.betterrecipes.com/blogs/daily-dish/2013/12/30/swedish-chocolate-balls/

IFTTT

Put the internet to work for you.

via Personal Recipe 3575582

Chipotle Burrito Bowl: Homemade and Hot!

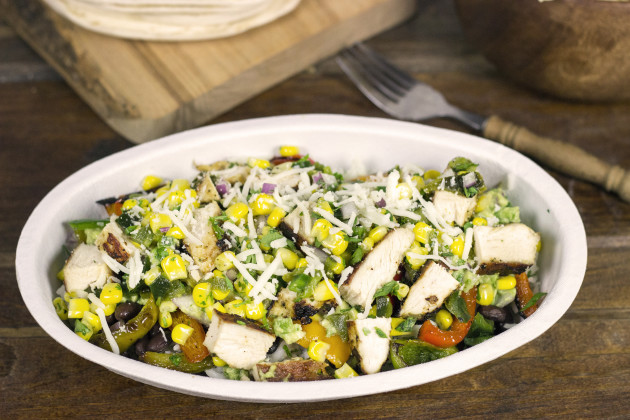
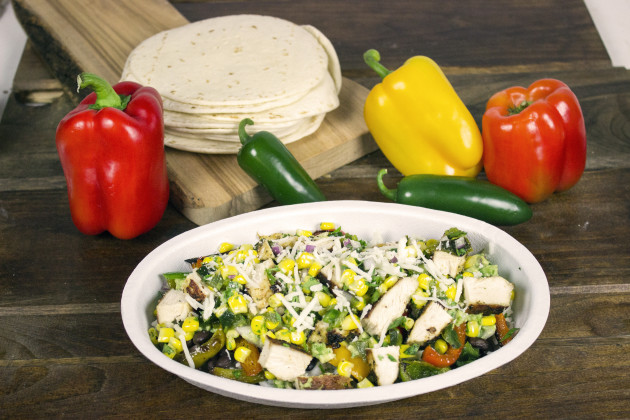
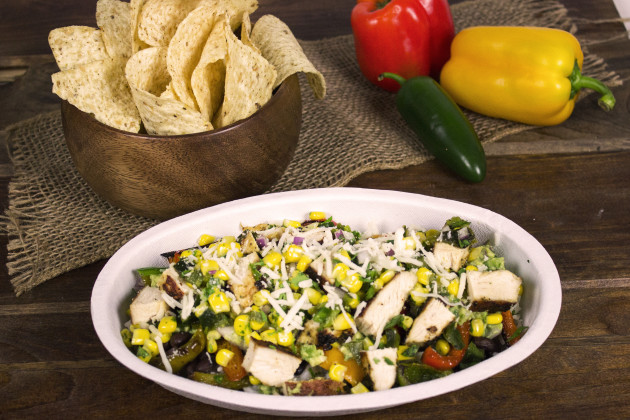
Chipotle Burrito Bowl Photo

Chipotle is by far my favorite fast-food restaurant. I'm not really sure if Chipotle can be called a fast-food restaurant…but either way, it's my favorite go-to restaurant when I need to pick up a quick meal and I'm just too worn out to cook. My wife and I have somehow gotten into the habit of picking up Chipotle Burrito Bowls on the way home if we've been traveling.

After being out of town for a couple days, the last thing we want to do is come home and make dinner (and then have to do the dishes, too). So Chipotle it is for us! I think it's safe to say that I've become quite addicted to the Chipotle Chicken Burrito Bowl. Part of my love for Chipotle comes from the fact that everything tastes so fresh!

My sister-in-law is absolutely addicted to Chipotle. I'm fairly certain she would eat there every single night if she could. But since she is in grad school, she's got to watch her budget, and eating out every night kinda defeats that whole "watch your budget" thing. So when she visited last year, I attempted to recreate Chipotle at home. And it was delicious!

Chipotle Burrito Bowl Picture

It did require a fair amount of effort simply because of the number of different components needed to make an authentic Chipotle Burrito Bowl, but it was so totally worth the effort! (And a side bonus was that my wife and I had enough leftovers for at least several more nights.)

I recently made the Chipotle Burrito Bowl again, and it was just as good (if not better) than before. There are a lot of parts to this recipe, so it might not be the best weeknight option. I suggest making this on a Saturday or Sunday afternoon (but make extra, and then have delicious leftovers for quick weeknight meals). I chose to go with chicken here because I find Chipotle's chicken to be quite tasty, but feel free to substitute your favorite meat instead.

Chipotle Burrito Bowl Image

There's a couple of key tricks I learned after recreating the Chipotle Burrito Bowl a couple of times:

  • Have lots of limes on hand for fresh lime juice 
  • Get plenty of cilantro, as it goes into almost every dish.

And of course, these burrito bowls can easily be turned into full-fledged burritos by adding the same ingredients to a large, steamed flour burrito. No matter which way you choose to eat it, this Chipotle Burrito Bowl recipe is strikingly similar to the real thing!

Make sure you're getting as authentic as possible! Make our Chipotle rice recipe and Chipotle guacamole recipe too.

Ingredients

  • 1 can chipotle in adobo
  • 1 teaspoon black pepper
  • 2 tablespoons fresh oregano, chopped
  • 6 cloves garlic, chopped
  • 1/2 red onion, coarsely chopped
  • 1/4 cup olive oil
  • 1/2 tablespoon cumin
  • 4 boneless skinless chicken breasts
  • chipotle rice
  • romaine lettuce
For Topping the Burritos:

Directions

  1. Remove one chile and 2 tablespoons adobo sauce from can. Coarsely chop chile and place in a medium bowl with the adobo sauce. 
  2. Add all remaining ingredients except for chicken breasts (black pepper, oregano, garlic, onion, cumin powder, and olive oil). Using an immersion blender or food processor, puree mixture until smooth.
  3. Place chicken breasts in a glass dish and coat both sides with the marinade. Cover dish with plastic wrap and place in the refrigerator for at least 3 hours, or up to 24 hours.
  4. Heat grill to medium high heat. Grill chicken until done, approximately 4-5 minutes per side.
  5. Coarsely chop grilled chicken.

To assemble the Burrito Bowl:

  1. Layer rice and lettuce in a bowl.
  2. Add black beans, grilled chicken, guacamole, corn salsa, shredded cheese, sour cream, and any additional toppings of your choice.
  3. Enjoy!

Notes

Tip: Reserve remaining chiles and adobo sauce for other recipes by freezing leftovers in a sandwich bag!

Source: Adapted from the Huffington Post


via Food Fanatic http://www.foodfanatic.com/2013/12/chipotle-burrito-bowl-homemade-and-hot/

IFTTT

Put the internet to work for you.

via Personal Recipe 3564685

Fondue Party Kit

Ring in 2014 with a Fondue Party!  This week you can win everything you need for both sweet and savory fondue fun.

Did you enter the "Elegant Tea" giveaway last week?  Click here to find out if you are the winner!  (Winners have three days to respond before an alternate winner is selected!)

Keep reading to learn how to win…

Here is what you can win this week:

Cilio Chocolate Fondue Set (Red)

Cilio Premium Fondue Set  (White)

Fondue Cookbook

Here's how you can enter to win:

Leave a comment below telling us your favorite kind of fondue!  

One lucky winner will be randomly selected in one week from today. Be sure to come back to see if YOU are the winner!  Winners will have 3 days to respond before an alternate winner is selected.  Official Rules

*Note: Comments need to be approved through WordPress. If you don't see yours right away, don't worry…I will get to it as soon as I can! Remember to leave a comment right here on the blog itself, not on one of the photos, or on our Facebook or Twitter pages.  Thanks!


via The Daily Dish http://www.betterrecipes.com/blogs/daily-dish/2013/12/30/fondue-party-kit/

IFTTT

Put the internet to work for you.
via Personal Recipe 3575582

Spinach Puffs

Bon Appétit  | November 2012

by The Bon Appétit Test Kitchen

]]> Spinach Puffs recipe

photo by Romulo Yanes

yield
Makes 6 servings

Serve these little spinach pies with a main course as your vegetable side and dinner roll in one, or eat a couple for a vegetarian dinner—they're that good.

Preparation

Using your hands, squeeze spinach until dry, forcing out as much water as possible (too much water will make for a soggy filling; you should have about 2/3 cup well-drained spinach). Mix spinach and next 5 ingredients in a medium bowl. Season to taste with salt and pepper. In a small bowl, beat 1 egg to blend; fold into spinach mixture.

Cut puff pastry into 3 equal strips. Reserve 1 strip for another use. Cut each remaining strip into 3 squares for a total of 6. Place a square in each muffin cup, pressing into bottom and up sides and leaving corners pointing up. Divide filling among cups. Fold pastry over filling, pressing corners together to meet in center. DO AHEAD: Spinach puffs can be assembled 3 hours ahead. Cover puffs and chill.

Preheat oven to 400°F. Beat remaining egg to blend in a small bowl. Brush pastry with egg wash (this will give the pastry a nice sheen). Bake until pastry is golden brown and puffed, about 25 minutes. Transfer to a wire rack; let puffs cool in pan for 10 minutes. Run a sharp paring knife around pan edges to loosen; turn out puffs onto rack to cool slightly before serving.

Per serving: 110 calories, 8 g fat, 2 g fiber

Nutritional analysis provided by Bon Appétit

my notes


via Epicurious.com: New Recipes http://feeds.epicurious.com/c/35380/f/665147/s/3551ffe2/sc/26/l/0L0Sepicurious0N0Crecipes0Cfood0Cviews0C51122450A0Dmbid0Frss0Iepinr/story01.htm

IFTTT

Put the internet to work for you.
via Personal Recipe 3575434

Related Posts Plugin for WordPress, Blogger...