Sunday, November 30, 2014

How To Cook Tender & Juicy Pork Chops in the Oven — Cooking Lessons from The Kitchn

Pin it button big

What if I told you that I could guarantee perfectly cooked, perfectly tender pork chops, every time? Would you believe me? Or have too many dinners of overcooked shoe-leather pork chops turned you off from this easy addition to the weeknight meal rotation? Let me convince you to try them one more time. Let me convince you to try roasting your pork chops in the oven.

Here is our step-by-step recipe for perfectly cooked, perfectly juicy pork chops.

1-Minute Video: How to Cook a Perfect Pork Chop!

A Quick Brine

Brining the pork chops is one of the best ways way to guarantee a juicy cooked pork chop. Even a quick 30-minute brine (or up to 4 hours) makes a big difference.

It's not strictly necessary — you can still use this method to make great pork chops even without brining — but if you have some extra time, I recommend it. Brining actually changes the cell structure within the meat, resulting in a noticeably juicier chop. The salt brine also seasons the interior of the meat. It won't taste "salty," just well-seasoned. You can even add other seasonings like garlic, peppercorns, fresh herbs, and lemon to the brine for more flavor. If you fear bland pork chops, definitely give brining a try.

Pin it button big

Stovetop to Oven

Pork chops are a tender, quick-cooking cut of meat — so quick-cooking, in fact, that they're very easy to overcook. This is why I like to start the chops on the stovetop where they get a good sear and then transfer them to the oven to finish cooking. The gentle heat of the oven helps us to control the rate of cooking a little better and also prevents the outside from getting tough and dry before the middle has finished cooking.

Pin it button big

Bone-On Pork Chops

I encourage you to look for bone-on pork chops. They take a little longer to cook than boneless chops, but in my experience, they are another way of ensuring tender cooked pork chops. And by "a littler longer to cook," I'm really only talking about a few minutes. It won't make a huge difference to your meal prep!

You can also make this whole process of cooking pork chops easier by using just one pan. Heat up the skillet in the oven while you get the rest of the meal prepped, then transfer it — carefully! — to a stove top burner to sear the pork chops. Once the chops are golden on the underside, you flip them and transfer the skillet back to the oven. The residual heat from the skillet will sear the other side of the pork chops while the heat of the oven cooks them through.

The result is a perfectly cooked pork chop: one that's golden and crusted on the outside and perfectly tender and juicy in the middle. Every time. Serve it with a simple side salad, roasted vegetables, or rice pilaf for an easy and quick weeknight meal.

How to Cook Tender & Juicy Pork Chops in the Oven

Makes 2 to 4 pork chops

What You Need

Ingredients

For the brine (optional):
3 cups cold water, divided
3 tablespoons coarse kosher salt (or 2 1/2 tablespoons table salt)
Optional flavorings: 2 smashed garlic cloves, 1/2 teaspoon black peppercorns, 1 bay leaf

For the pork chops:
2 to 4 pork chops — center cut, bone-on, 3/4-inch to 1-inch thick (about 1 pound each)
Olive oil
Salt
Pepper

Equipment
Shallow dish (for brining)
Large cast iron, stainless steel, or other oven-safe skillet
Tongs

Instructions

  1. Brine the pork chops (optional): If you have time, brining the pork for even a brief period adds flavor and ensures juiciness in the finished chop. Bring 1 cup of the water to a boil, add the salt and optional flavorings, and stir to dissolve the salt. Add 2 more cups of cold water to bring the temperature of the brine down to room temperature. Place the pork chops in a shallow dish and pour the brine over top. The brine should cover the chops — if not, add additional water and salt (1 cup water to 1 tablespoon salt) until the chops are submerged. Cover the dish and refrigerate for 30 minutes or up to 4 hours.
  2. Heat the oven and skillet: Position a rack in the middle of the oven and preheat to 400°F. Place the skillet in the oven to preheat as well.
  3. Season the pork chops: While the oven heats, prepare the pork chops. Remove the chops from the brine; if you didn't brine, remove the chops from their packaging. Pat dry with paper towels. Rub both sides with olive oil, then sprinkle with salt and pepper. Set the chops aside to warm while the oven finishes heating.
  4. Remove the skillet from the oven: Using oven mitts, carefully remove the hot skillet from the oven and set it over medium-high heat on the stovetop. Turn on a vent fan or open a window.
  5. Sear the pork chops: Lay the pork chops in the hot skillet. You should hear them immediately begin to sizzle. Sear until the undersides of the chops are seared golden, 3 minutes. The chops may start to smoke a little — that's ok. Turn down the heat if it becomes excessive.
  6. Flip the chops and transfer to the oven: Use tongs to flip the pork chops to the other side. Immediately transfer the skillet to the oven using oven mitts.
  7. Roast the chops until cooked through: Roast until the pork chops are cooked through and register 140°F to 145°F in the thickest part of the meat with an instant-read thermometer. Cooking time will be 6 to 10 minutes depending on the thickness of the chops, how cool they were at the start of cooking, and whether they were brined. Start checking the chops at 6 minutes and continue checking every minute or two until the chops are cooked through.
  8. Rest the chops: Transfer the cooked pork chops to a plate and pour any pan juices over the top (or reserve for making a pan sauce or gravy). Tent loosely with foil and let the chops rest for at least 5 minutes before serving.

Want more smart tutorials for getting things done around the home?
See more How To posts
We're looking for great examples of your own household intelligence too!
Submit your own tutorials or ideas here!

(Images: Emma Christensen)

Our Pork Chops Featured In This Short Film

Dear Readers,

Last month we made a short film for fun inspired by this pork chop recipe, you all, Woody Allen, Charlie Chaplin and this amazing song by The von Trapps & Pink Martini. We invite you to take a few minutes to watch and send it to your friends. :)


via Recipe | The Kitchn http://feeds.thekitchn.com/~r/thekitchn/recipes/~3/4Dle146rylk/how-to-cook-perfect-pork-chops-in-the-oven-cooking-lessons-from-the-kitchn-194257

IFTTT

Put the internet to work for you.

Turn off or edit this Recipe

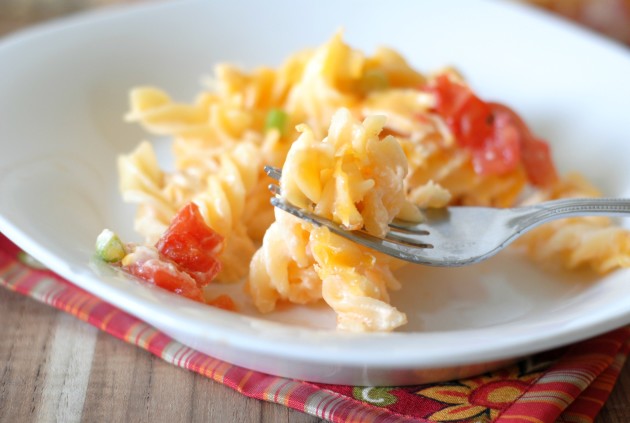
Gluten Free Chicken Casserole

Gluten Free Chicken Casserole Photo

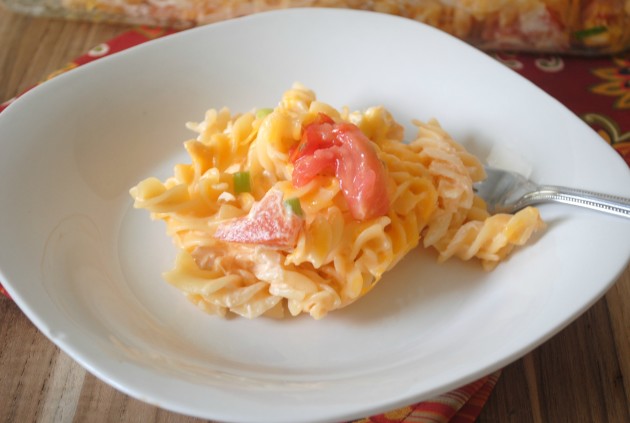
During the fall and winter months, I just crave casserole style meals. Do you? This cheesy gluten free chicken casserole happens to be a new favorite for me. I love the warm taste of it. It tastes just like a dish my husband's grandma would have made us.

She was very much a homemade, comfort food type of cook, and she cooked all the time. Each time we would go to her home to visit, being well into her 90's, she would still get up and cook us a HUGE breakfast before the sun was up! I remember the first time we visited and I was in shock.

Gluten Free Chicken Casserole Picture

This was also before I cooked regularly too, so I could not even imagine getting up that early to cook such a wide array of foods for breakfast. At that point in my life, I was lucky to get a quick bowl of cereal before work.

This casserole is very much a comfort meal. I love how kid-friendly it is too, plus I used rotisserie chicken, which greatly cut down on the cook time. I love using pre-cooked chicken for meals and this is the perfect one to use it in.

Gluten Free Chicken Casserole Image

Then, there is the cheese. This casserole is full of cheese, which happens to be a favorite in our household! I've found that adding cheese to meals is a great way to get my kids to try out new recipes. They just can't live without their cheese!

Gluten Free Chicken Casserole Pic

This recipe is perfect served with a big glass of milk and a side of corn on the cob. We had plenty of leftovers to reheat and use throughout the week too. That's another reason why I love casseroles; it usually gives me a day off from cooking throughout the week because of the leftovers.

Are you ready for a tasty casserole tonight? Try this one!

Ingredients

  • 12 ounces gluten free spiral pasta
  • 8 ounces cream cheese
  • 1/2 cup milk
  • 1 clove garlic, crushed
  • 2 cups sharp cheddar cheese, shredded and divided
  • 2 cups cooked shredded chicken
  • 1/2 cup green onions, chopped
  • 1 tomato, diced

Directions

  1. Preheat oven to 350°F.
  2. Cook the pasta in accordance with package instructions, then drain.
  3. While the pasta is draining, place the cream cheese in the bottom of the stock pot used for the pasta and warm it up to melt.
  4. Pour in the milk and the crushed garlic; continue stirring to melt the cream cheese.
  5. Mix in 1 cup of shredded sharp cheddar cheese until melted.
  6. Add in the pasta and mix well with the cheese.
  7. Mix in the cooked chicken. At this point if it is a little dry, add a little more milk to make it creamy.
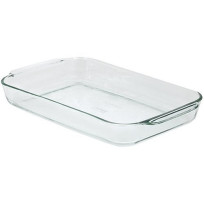
  8. Pour the pasta mixture into a greased 9"x13" baking dish.
  9. Top with the additional cheese, green onions, and tomato.
  10. Bake for 30 minutes or until the cheese is nicely melted on top.

Recommended Equipment


via Food Fanatic http://www.foodfanatic.com/2014/11/gluten-free-chicken-casserole/

IFTTT

Put the internet to work for you.
Turn off or edit this Recipe

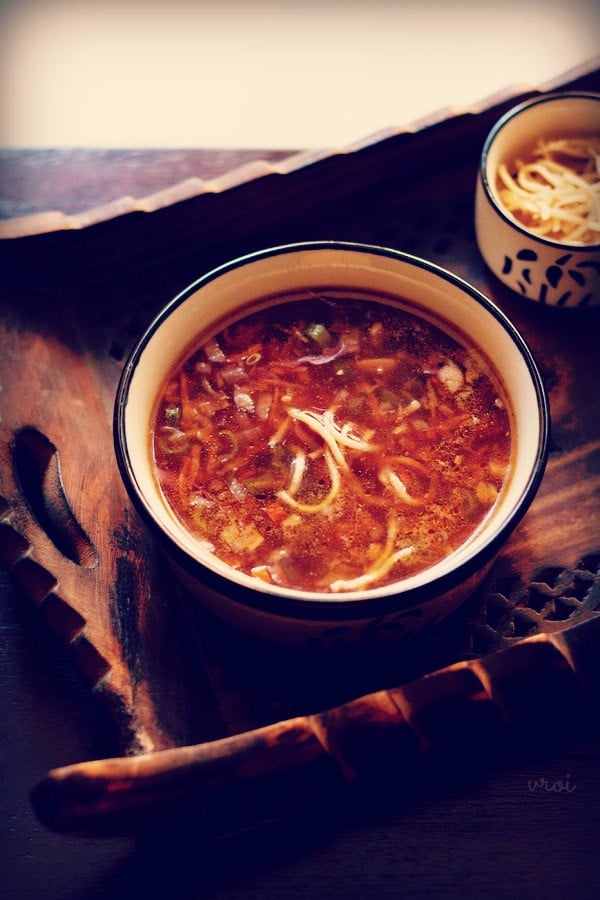
veg manchow soup recipe, how to make veg manchow soup recipe

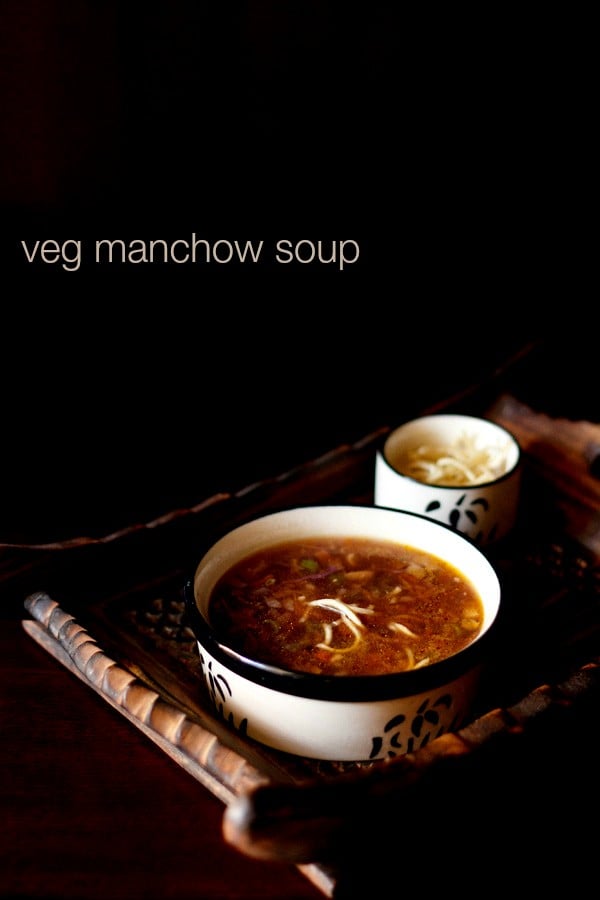
veg manchow soup

veg manchow soup recipe with step by step photos – posting yet another indo chinese soup recipe.

manchow soup is a spicy and hot soup made from mixed vegetables. apart from veg hot and sour soup, manchow soup and tom yum soup are some of the soups we order from chinese takeaways and in restaurants.

as always for proteins i have added mushrooms. you can add tofu or sprouts. i do not get good quality tofu here and hence they don't get added to soups or any stir fries.

in the indian chinese restaurants, the soup is served with fried noodles. just to give a restaurant like flavor, i also added fried noodles. i was making both the soup and veg chowmein together and hence kept some noodles for frying. you can completely skip the fried noodles part and serve the soup as it is.

in restaurants, what they serve is a thick soup, which we do not prefer. so i add less corn starch in the soup. thickness can be easily adjusted by adding more or less of corn starch.

serve veg manchow soup as starter with any indo chinese main course.

step by step vegetable manchow soup recipe:

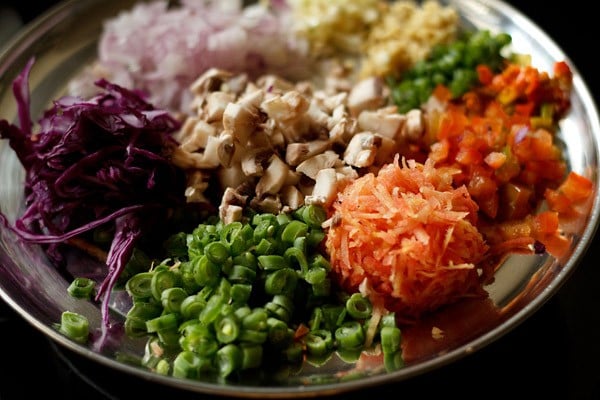
1. first chop all the veggies and keep aside.

chop vegetables to make soup

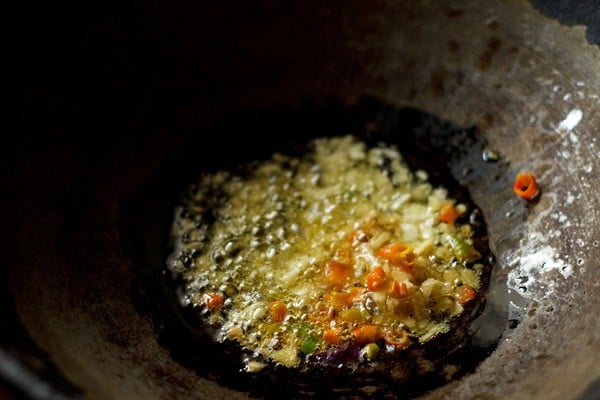
2. heat oil in a wok or pan and add the chopped fresh red chilies, garlic and ginger. saute for a minute

saute ginger garlic to make soup recipe

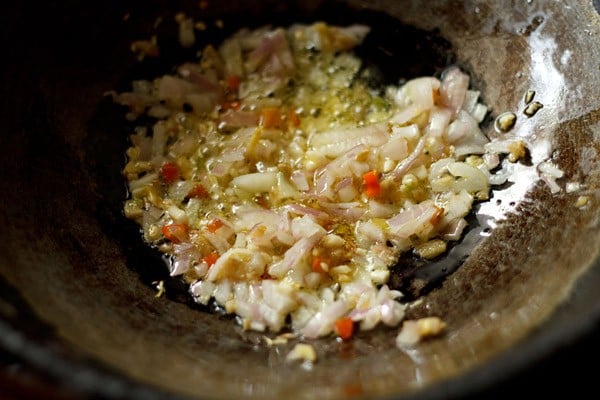
3. then add chopped onions. saute again for a minute.

saute onions to make manchow soup

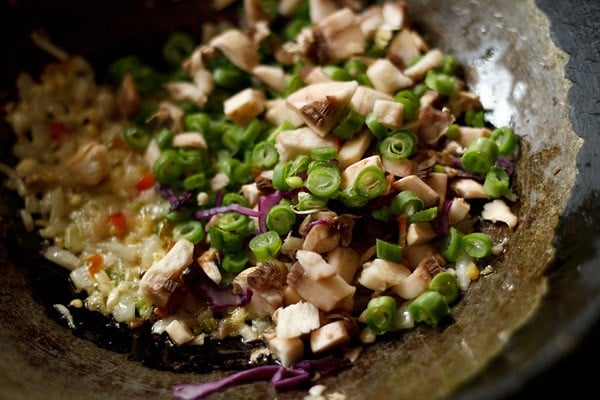
4. now add finely chopped french beans and chopped mushrooms. stir fry on a medium to high flame till the mushrooms get lightly browned from the edges.

add mushrooms - making veg manchow soup recipe

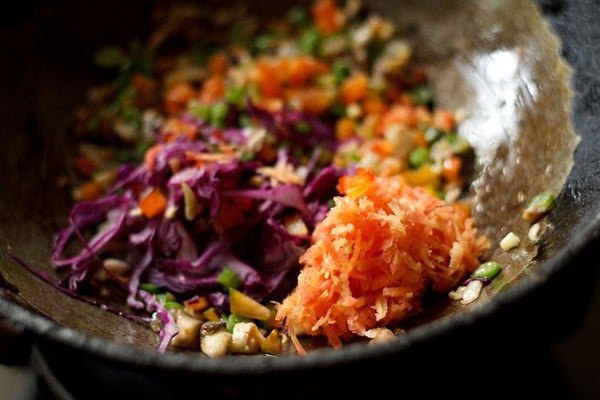
5. then add grated carrots, shredded cabbage, finely chopped capsicum/bell pepper & celery.

add vegetables to make manchow soup recipe

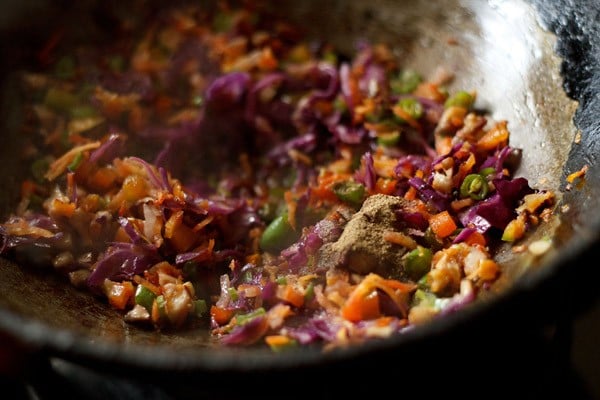
6. stir fry on a medium to high flame for 3 to 4 minutes. add black pepper and soy sauce. stir.

stir frying veggies to prepare veg manchow soup recipe

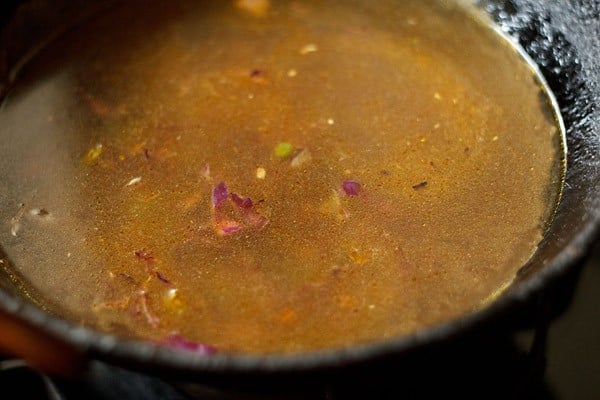
7. add water or veg stock to the stir fried veggies.

add veg stock - making manchow soup

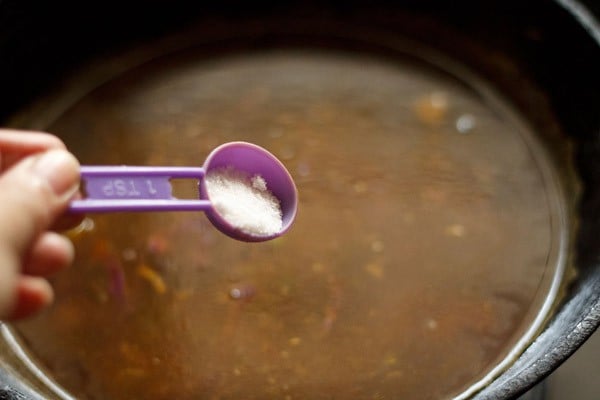
8. season with salt. add less salt initially as soy sauce already has salt in it.

add salt to vegetable manchow soup recipe

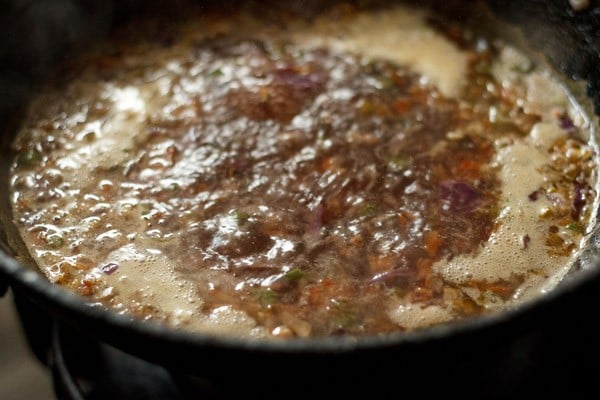
9. allow the soup to come to a simmer on medium flame.

thicken the veg manchow soup recipe

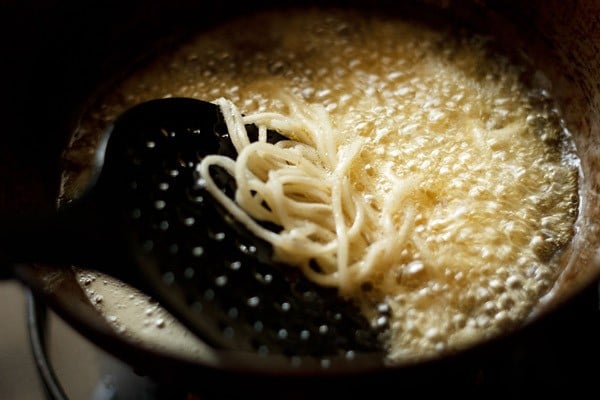
10. in the meantime, if you have cooked noodles, then add them to medium hot oil for frying. this is an optional step.

noodles for manchow soup recipe

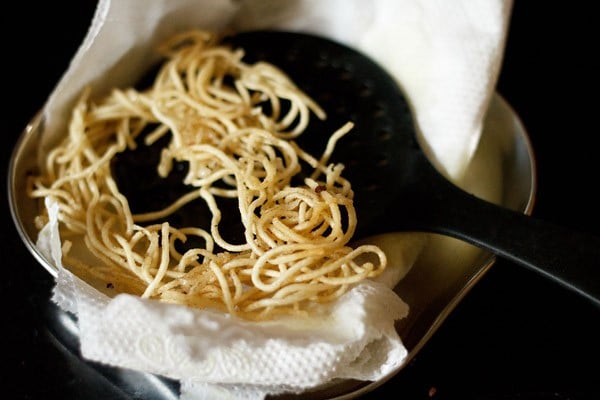
11. fry the noodles till they are crisp. drain the fried noodles on kitchen paper towels.

fried noodles for veg manchow soup recipe

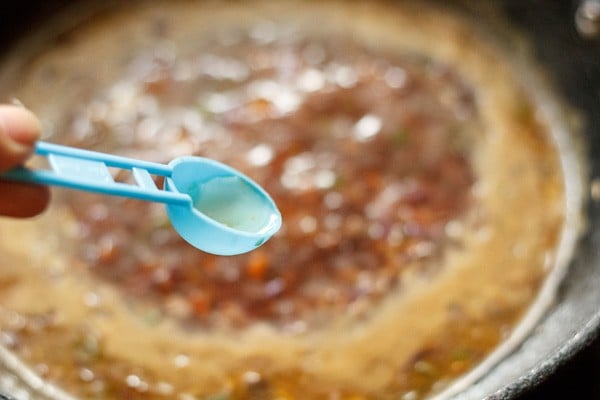
12. meanwhile. make a smooth paste of the corn starch with water.

corn starch paste for vegetable manchow soup recipe

13. add the corn starch paste to the soup.

add corn starch paste to manchow soup recipe

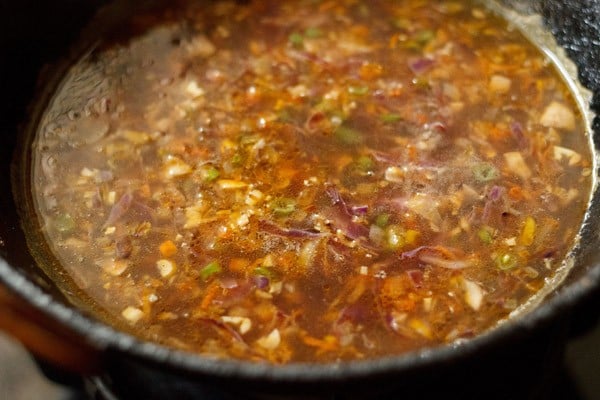
14. stir very well and let the manchow soup thicken.

vegetable manchow soup recipe

15. lastly add rice vinegar or regular vinegar. switch off the flame. stir and check the taste. add more seasonings like salt, black pepper or soy sauce or vinegar if required.

add vinegar to veg manchow soup recipe

16. stir and serve vegetable manchow soup hot topped with fried noodles or just plain garnished with coriander leaves.

veg manchow soup recipe

if you are looking for more vegetarian soup recipes then do check tomato soup, spinach soup, cream of celery soup, cream of mushroom soup, sweet corn soup and thai veg tofu soup recipe.

vegetable manchow soup recipe details below:

veg manchow soup recipe

veg manchow soup recipe - spicy and hot soup made from mixed vegetables

AUTHOR:

RECIPE TYPE: starter

CUISINE: indo chinese

SERVES: 2 to 3

INGREDIENTS (measuring cup used, 1 cup = 250 ml)

for the soup:

  • ¼ cup shredded cabbage
  • ¼ cup grated carrots
  • ¼ to ⅓ cup sliced or chopped mushrooms
  • ¼ cup finely chopped french beans
  • ¼ cup finely chopped onion or spring onion whites
  • 1 tsp finely chopped ginger/adrak
  • 1 tsp finely chopped garlic/lahsun
  • 1 tsp finely chopped celery (optional)
  • 1 to 2 fresh red chilies or green chilies, finely chopped
  • ½ tsp rice vinegar or regular vinegar
  • 2 tsp soy sauce or add as required
  • ¼ tsp black pepper or white pepper powder, add as required
  • 3 cups water or veg stock
  • 6 tsp cornstarch dissolved in 2 tbsp water (for a slight thicker consistency in the soup, dissolve 7 to 8 tsp corn starch in 3 tbsp water)
  • 2 tsp finely chopped coriander leaves for garnish, (optional)
  • 1 tbsp sesame oil or any other oil
  • salt as required

for the fried noodles: (optional)

  • ⅓ cup cooked noodles
  • oil for frying, as required

INSTRUCTIONS

  1. first chop all the veggies and keep aside.
  2. heat oil in a wok or pan and add the chopped fresh red chilies, garlic and ginger.
  3. saute for a minute and then add chopped onions. saute again for a minute.
  4. now add finely chopped french beans and chopped mushrooms.
  5. stir fry on a medium to high flame till the mushrooms get lightly browned from the edges.
  6. then add grated carrots, shredded cabbage, finely chopped capsicum/bell pepper & celery.
  7. stir fry on a medium to high flame for 3 to 4 minutes.
  8. in the meantime, if you have cooked noodles, then add them to oil for frying. this is an optional step.
  9. fry the noodles till they are crisp. drain the fried noodles on kitchen paper towels.
  10. once the veggies are stir fried for 3 to 4 minutes, then add soy sauce and black pepper. stir.
  11. now add water or veg stock.
  12. season with salt. allow the soup to come to a simmer on a medium flame. keep a check on the amount of salt as soy sauce already has a lot of salt.
  13. meanwhile. make a smooth paste of the corn starch with water.
  14. add the corn starch paste to the soup. stir very well and let the manchow soup thicken.
  15. lastly add rice vinegar or regular vinegar. switch off the flame. stir and check the taste. add more seasonings like salt, black pepper or soy sauce or vinegar if required.
  16. stir and serve vegetable manchow soup hot topped with fried noodles. you can also mix chopped coriander leaves towards the end or serve the soup garnished with coriander leaves.

3.2.2885


Categories


via Veg Recipes of India http://feedproxy.google.com/~r/VegRecipesOfIndia/~3/JTWgpzg5RUQ/

IFTTT

Put the internet to work for you.
Turn off or edit this Recipe

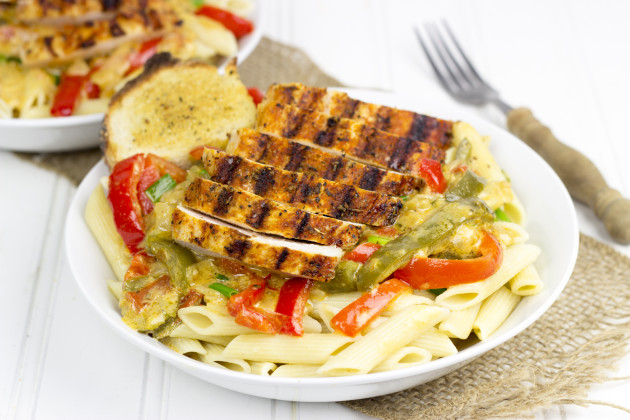
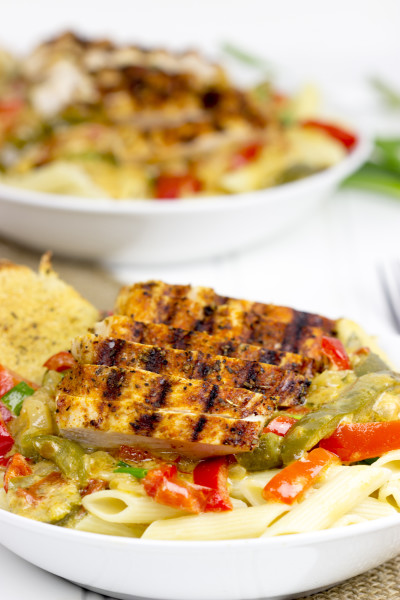
Blackened Chicken Pasta

Blackened Chicken Pasta Photo

I've always loved to cook and bake. I grew up in a traditional Southern household, which meant there were always sweet treats and freshly baked snacks around. After graduating from college, I developed a love for baking and cooking.

This partially grew out of necessity since cooking your own meals is typically a lot cheaper than going out to eat. However, this interest soon turned into a passion, and I began looking for opportunities to cook and bake for friends. This blackened chicken pasta has been in my recipe box for many years, and it's definitely one of my favorites!

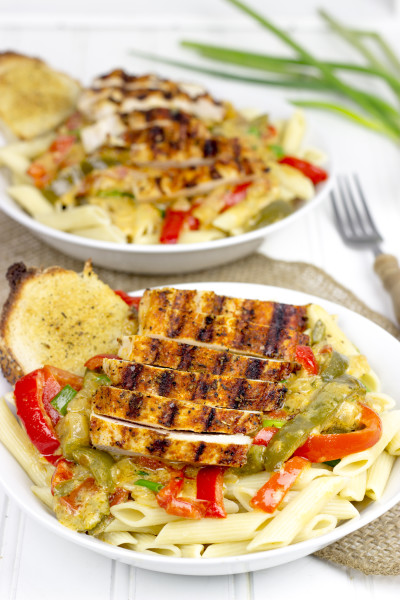
Blackened Chicken Pasta Picture

Even though I loved to cook and bake at home, I certainly still enjoyed going out to eat. I moved to south Louisiana after college, and if you know anything about that area of the U.S., then you certainly know about the delicious Cajun food!

There was no shortage of amazing restaurants featuring all kinds of amazing food. Whenever company came to visit, one of my favorite places to go was Ralph and Kacoo's restaurant.

Not only did they serve a great selection of Cajun food, but the Baton Rouge location often had a live band playing Zydeco music. Tasty food, good music and even a bit of Cajun Two Step dancing. Talk about a good way to introduce folks to southern Louisiana!

On one occasion, Ralph & Kacoo's had printed up recipe cards for their blackened chicken pasta. You don't often see restaurants handing out their recipes, so I grabbed one and stuck it in my recipe box at home.

Blackened Chicken Pasta Image

I didn't find it again until a couple years later when I had moved away from south Louisiana. My wife and I invited a couple of friends over, and we made a big pan of this pasta for everyone to enjoy.

It was delicious, and it totally reminded me of the tasty Cajun food in south Louisiana! This recipe is nearly identical to the one from Ralph & Kacoo's.

I made my own Cajun blackened seasoning, but you could certainly use you're a store-bought version instead. I also slightly reduced the butter in the recipe, and I finished the dish with freshly grated Parmesan cheese.

Mix things up a bit tonight! Pop open an Abita beer, turn on some Cajun Zydeco (look for a station on Pandora) and enjoy a plate of this delicious blackened chicken pasta. If you're looking for more tasty Cajun food, check out my Cajun grilled shrimp or my Creole red beans and rice.

Ingredients

  • 3 boneless skinless chicken breasts
  • 2 tablespoons butter, melted
  • 4 1/2 tablespoons cajun blackened seasoning, divided
  • 4 tablespoons olive oil
  • 1 tablespoon garlic, minced
  • 1 medium white onion, sliced
  • 1 green bell pepper, sliced
  • 1 red bell pepper, sliced
  • 3 1/2 cups heavy whipping cream
  • 2 medium whole tomatoes, diced
  • 3/4 cup green onions, chopped
  • 1 pound ziti pasta
  • grated parmesan cheese
  • french bread, for serving (optional)

Directions

  1. Heat grill to medium heat.
  2. Brush chicken with melted butter and rub both sides with 3 Tbsp of Blackened Seasoning. (Note: The remaining Blackened Seasoning will be used later.)
  3. Place chicken on grill and grill over medium heat until done, flipping once (~6-7 minutes per side).
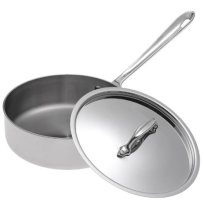
  4. Meanwhile, place the olive oil in a deep sauté pan over medium heat. Add the minced garlic and saute for 2-3 minutes, stirring occasionally. Add the sliced onion and peppers; continue cooking over medium heat until onion and peppers are soft (~10 minutes).
  5. Add the heavy whipping cream and remaining Blackened Seasoning. Increase heat to high and bring mixture to a boil.
  6. Reduce heat to medium and continue cooking for 5 minutes.
  7. Add diced tomatoes and continue cooking over medium heat until sauce thickens noticeably (15-18 minutes).
  8. While the sauce is cooking, cook the pasta according to the package directions.
  9. Once sauce has thickened, fold in the chopped green onions.
  10. Divide the cooked pasta into 4 bowls and top with sauce. Slice blackened chicken breasts into strips and lay on top of pasta.
  11. Finish with freshly grated Parmesan cheese and serve with slice of crusty French bread (optional).

Notes

Blackened Chicken Pasta recipe slightly adapted from Ralph & Kacoo's.

Recommended Equipment


via Food Fanatic http://www.foodfanatic.com/2014/11/blackened-chicken-pasta/

IFTTT

Put the internet to work for you.
Turn off or edit this Recipe

Related Posts Plugin for WordPress, Blogger...