Saturday, March 31, 2018

Guava Cheese Empanadas

Guava Cheese Empanadas Recipe

Ingredients

  • 10 Empanada Wrappers, thawed*
  • 4 ounces Cream Cheese
  • 2 ounces Guava Paste
  • Vegetable Oil, for frying

Directions

  1. Slice the cream cheese into 1/4 inch slices. Dice the guava into 1/4 inch cubes.
  2. Take 1 slice of cream cheese and place on half of empanada disc. Top with a few cubes of guava paste. Fold dough over and press edges to seal. Crimp edges with a fork. Repeat with remaining ingredients.
  3. To cook, heat 1/2 inch of oil in a frying pan over medium heat. Add empanadas to pan, but do not over-crowd. Cook for about 2 minutes, or until golden brown. Flip empanada and cook for another 2 minutes. Drain on paper towels. Continue process until all the empanadas have been fried.


Notes

  • If you cannot find empanada discs in the freezer section, you can substitute refrigerated pie dough instead.

Recommended


via Food Fanatic https://ift.tt/2GWEsPP
RSS Feed

Food Fanatic

IFTTT

Friday, March 30, 2018

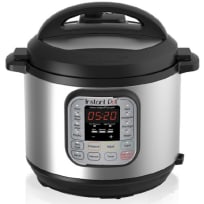
Instant Pot Cabbage Soup Recipe

Instant Pot Cabbage Soup Recipe

Ingredients

  • 1 1/2 pounds Lean Ground Beef
  • 1 medium Onion, diced
  • 1 teaspoon Salt
  • 1/2 teaspoon Black Pepper
  • 2 teaspoons Chili Flakes
  • 1 head Cabbage, (small) shredded
  • 1 Red Bell Pepper, seeded and diced
  • 2 cups Diced Carrots, peeled
  • 3 quarts Beef Broth
  • 2 15 ounce cans Diced Tomatoes
  • 1 15 ounce can Tomato Sauce
  • 1/2 cup Basmati Rice

Directions

  1. Preheat your Instant Pot on sauté mode. Place the ground beef, onion, salt, pepper, and chili flakes into the pot.
  2. Brown ground beef for 5-10 minutes, chopping as it cooks.
  3. With the Instant Pot still on sauté, and add in the cabbage, red bell pepper, carrots, beef broth, diced tomatoes, and tomato sauce.
  4. Let the liquid in the pot come to a simmer, press cancel on the pot, put the lid on, and close the vent. Set the pot to manual, high pressure, for 5 minutes.
  5. Carefully release the pressure of the pot. Be careful of escaping liquids. When you cook soups and the pot is nearly full, sometimes liquid can come out of the vent if you release the pressure too quickly. I've never had this happen to me, but I keep it in mind with quick releasing anything with a lot of liquid. Place a dish towel over the vent before releasing pressure. If liquid starts coming out, carefully close the vent and allow the pressure to naturally come down for a few minutes before trying again.
  6. Once the pressure is released and the pin falls, carefully remove the lid and add in the basmati rice. Close the lid and set the pot to manual, high pressure, for 5 minutes.
  7. Let the pressure release naturally for 5-10 minutes, and then vent the rest of the pressure using the method above.
  8. Stir well and serve with crusty bread.


Recommended


via Food Fanatic https://ift.tt/2GYTfts
RSS Feed

Food Fanatic

IFTTT

Thursday, March 29, 2018

Rock Cakes Recipe

Rock Cakes Recipe

Ingredients

  • 2 cups All-Purpose Flour
  • 1 1/2 teaspoons Baking Powder
  • 1/2 teaspoon Salt
  • 3 tablespoons Light Brown Sugar, plus a little extra for sprinkling the tops
  • Whole Nutmeg, freshly grated (to taste)
  • 1/4 teaspoon Allspice
  • 4 ounces Unsalted Butter, cut into cubes
  • 1 cup Dried Currants, or other dried fruit
  • 2 large Eggs, beaten
  • 1/4 cup Cold Milk

Directions

  1. Preheat the oven to 350°F.
  2. Sift the flour, baking powder and salt into a large bowl. Add the sugar, nutmeg and allspice.
  3. Add the butter and use your fingers to rub the butter into the flour mix until it resembles coarse breadcrumbs.
  4. Stir in the currants, eggs and milk. Mix to form a stiff batter and all the flour is absorbed.
  5. Drop palm-size mounds of the batter onto a parchment lined baking sheet, 2 inches apart.
  6. Sprinkle the tops with sugar.
  7. Bake for 15 minutes until they are golden.
  8. Transfer to a rack to cool completely.

Recommended


via Food Fanatic https://ift.tt/2GgsQKq
RSS Feed

Food Fanatic

IFTTT

Wednesday, March 28, 2018

Peanut Butter Potato Chip Rice Krispie Treats

Peanut Butter Potato Chip Rice Krispie Treats Recipe

Ingredients

  • 6 tablespoons Butter
  • 16 ounces Miniature Marshmallows
  • 1 teaspoon Pure Vanilla Extract
  • 1/2 cup Creamy Peanut Butter
  • 8 ounces Potato Chips, lightly crushed, divided
  • 3 cups Rice Krispies Cereal
  • 1 cup Salted Peanuts, chopped, divided
  • 1 cup Peanut Butter Chips, melted

Directions

  1. Coat a 9-inch square baking pan with non-stick spray.
  2. In a large pot over medium-low heat, melt the butter.
  3. Add the marshmallows and vanilla, continue cooking and stirring until marshmallows are melted and smooth.
  4. Add peanut butter, stirring until smooth.
  5. Remove from heat.
  6. Stir in potato chips, reserving 1/3 cup for garnish, Rice Krispies cereal, and 3/4 cup peanuts.
  7. Press mixture evenly into the bottom of the prepared pan.
  8. Drizzle bars with melted peanut butter chips.
  9. Sprinkle with reserved potato chips and peanuts, pressing to adhere to the melted peanut butter chips.
  10. Allow to set. Cut into bars.


Recommended


via Food Fanatic https://ift.tt/2pPcugX
RSS Feed

Food Fanatic

IFTTT

Gluten Free Sweet Potato & Sausage Egg Cups

Gluten Free Sweet Potato & Sausage Egg Cups Recipe

Ingredients

  • 1 pound Ground Sausage, mild
  • 1 teaspoon Fennel Seed
  • 1/4 cup Diced White Onion
  • 1 medium Sweet Potato, sliced & cubed
  • 1 Red Pepper, diced
  • 1/2 teaspoon Salt
  • 1/2 teaspoon Black Pepper
  • 8 Eggs

Directions

  1. Preheat the oven to 400°F.
  2. In a cast iron skillet, cook the ground sausage until well-done, mix in the fennel seed.
  3. Do not drain the pan.
  4. Set aside the sausage on a paper towel lined plate, to drain off excess grease.
  5. While the sausage is draining, add in the onion, potato, and pepper into the pan.
  6. Cook this on medium-high heat for about 10 minutes until the veggies have softened.
  7. Spray a muffin pan with non-stick cooking spray. Coat each tin well to avoid sticking.
  8. Combine the sausage with the veggies in a large bowl and mix together well.
  9. Fill each muffin tin with the filling.
  10. In a mixing bowl, whisk together the eggs to combine.
  11. Pour it over each muffin tin nearly to the top.
  12. Bake for 15 minutes at 400°F or until nicely browned.


Recommended


via Food Fanatic https://ift.tt/2GhPdv1
RSS Feed

Food Fanatic

IFTTT

Tuesday, March 27, 2018

Hot Cross Buns

Hot Cross Buns Recipe

Ingredients

For the Buns:
  • 3 cups Unbleached All-Purpose Flour
  • 3 tablespoons Granulated Sugar
  • 3/4 teaspoon Salt
  • 3 1/2 teaspoons Instant Yeast
  • 1 tablespoon Lemon Zest, zest of 1 lemon
  • 1 teaspoon Cinnamon
  • 1/4 teaspoon Nutmeg
  • 1/4 teaspoon Allspice
  • 1/4 teaspoon Ground Cloves
  • 2 large Eggs, at room temperature, slightly beaten
  • 1/2 cup Buttermilk, at room temperature
  • 2 tablespoons Unsalted Butter, melted
  • 1 teaspoon Pure Almond Extract
  • 1/4 cup Water, at room temperature
  • 1 cup Raisins
For the Cross:
  • 2 tablespoons All-Purpose Flour
  • 2 tablespoons Water
For the Glaze:
  • 2 tablespoons Water
  • 2 tablespoons Granulated Sugar
  • 2 tablespoons Honey
  • 1 teaspoon Lemon Extract

Directions

  1. In the bowl of a stand mixer, or in a large bowl, mix together the flour, sugar, salt, yeast, lemon zest, cinnamon, nutmeg, allspice and cloves.
  2. Add the eggs, buttermilk, melted butter and almond extract and start to mix on low speed.
  3. Drizzle in the water slowly with the mixer running, using just enough water to form a soft dough.
  4. If the dough still looks dry add more water, a teaspoon at a time until it's a soft ball.
  5. Knead the dough with the dough hook for 5 minutes (7-8 minutes by hand) until it is soft and slightly tacky, but not sticky at all. If it's too sticky sprinkle in a little more flour, if it is stiff then add a little more water, until you have a smooth, soft dough.
  6. Add the raisins and knead for 1-2 more minutes until they are dispersed throughout the dough. You may have to do the last of the kneading by hand to get all of the raisins into the dough.
  7. Transfer the dough to an oiled bowl, turning it to coat, and cover with plastic wrap. Allow the dough to rise until doubled, about 60-90 minutes.
  8. Lightly spray a 9x13-inch baking pan with non-stick spray. Punch down the risen dough and remove it from the bowl to an oiled countertop.
  9. Cut the dough into 12 equal pieces, about 3 ounces each, and roll each piece into a round ball. The easiest way is to roll the dough pieces on the counter, cupping your hand around the dough, with the edge of your hand on the counter. After 10-15 seconds of rolling it this way it will form a nice round ball with a smooth top.
  10. Place the buns in the prepared baking dish. Cover them with plastic wrap sprayed with non-stick spray.
  11. Allow the buns to rise until doubled, about one hour.
  12. Preheat the oven to 325°F. In a small bowl, whisk together the flour and water for the crosses to form a paste. Spoon this paste into a ziplock bag or a piping bag.
  13. Cut a small corner from the ziplock bag and pipe the paste into cross shapes on the tops of the buns.
  14. Bake for 25-27 minutes until the buns are golden brown and an instant read thermometer inserted into the center of one reads 190°F.
  15. Allow the buns to cool in the pan for 5 minutes.
  16. In a small saucepan over medium heat, bring the water and the sugar to a boil.
  17. Add the honey and lemon extract and whisk to combine and then remove from the heat. Remove the buns to a wire rack and brush with the glaze, you may not need it all.
  18. Let the buns cool completely on the wire rack.


Notes

  • These hot cross buns are best the day they are baked, but can be reheated and enjoyed for a couple of days. If you want to prep them ahead, you can make them up to the point where you shape them into buns, then let them rise until they're almost doubled (30-45 minutes), and then place them in the fridge overnight. The next day take them out of the fridge to warm up and finish rising about 90 minutes before you're ready to bake them.

Recommended

Source: Adapted from The Bread Baker's Apprentice.


via Food Fanatic https://ift.tt/2urCMva
RSS Feed

Food Fanatic

IFTTT

Avocado Prosciutto Brie Sandwiches

Avocado Prosciutto Brie Sandwiches Recipe

Ingredients

For the Blood Orange Mango Chutney:
  • 2 large Blood Oranges
  • 1 tablespoon Vegetable Oil
  • 1/2 cup Yellow Onion, chopped
  • 1 tablespoon Minced Fresh Jalapeño
  • 1 1/2 teaspoons Curry Powder
  • 1/4 teaspoon Salt
  • 1/4 teaspoon Cayenne Pepper
  • 2 cups Mango, chopped
  • 1/2 cup Apple Cider Vinegar
  • 1/2 cup Dark Brown Sugar, packed
For the Sandwiches:
  • 2 Croissants, split in half
  • 6 slices Prosciutto
  • 1 Avocado, peeled, pitted and sliced
  • 6 ounces Brie Cheese, sliced
  • 1 cup Arugula

Directions

  1. To make the chutney, zest blood orange to yield 1 tablespoon. Remove the peel and pith from the oranges. Segment the oranges over an empty bowl. Discard the remaining insides of the fruits.
  2. Heat a saucepan over medium-high heat. Add vegetable oil. Once the oil is hot, add the onion, jalapeño, curry powder, salt, and cayenne. Cook for 2 minutes, stirring constantly.
  3. Add in the mango and cook for another 2 minutes, still stirring. Add in the orange segments with their juice, vinegar, sugar and zest. Cook for another 2 minutes while stirring.
  4. Reduce heat and simmer, stirring every so often, until thickened, approximately 25 to 30 minutes. Remove from heat. Let cool before serving.
  5. To make the sandwiches, top the bottom halves of the croissant sandwiches with 3 slices of prosciutto and half of the brie slices.
  6. Add the bottom halves to a small baking sheet. Place in the oven under the broiler set to high. Broil until cheese is gooey and melted.
  7. Remove from oven and add bottom halves of the sandwiches to plates. Top with 2 to 3 slices of avocado, followed by a layer of arugula and then mango chutney. Top with top halves of the croissant and serve.


Recommended


via Food Fanatic https://ift.tt/2I9aKXx
RSS Feed

Food Fanatic

IFTTT
Related Posts Plugin for WordPress, Blogger...